40 More Great Flight Simulator Adventures
by Charles Gulick
Wrapping
the
Box
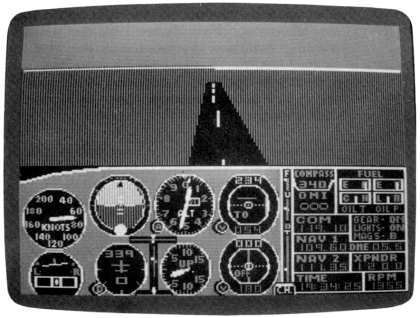
Spanaway VI
Box
Spanaway VI
| North Position: 21218 | Rudder: 32767 |
| East Position: 6492 | Ailerons: 32767 |
| Altitude: 384 | Flaps: 0 |
| Pitch: 0 | Elevators: 32767 |
| Bank: 0 | Time: 19:00 |
| Heading: 135 | Season: 3-Summer |
| Airspeed: 0 | Cloud Layer 1: 10000, 8000 |
| Throttle: 0 | Wind: 6 Kts, 156 |
| You had an early dinner so you
could get out here and take some pattern
practice. It's a nice summer evening. There's an overcast, but it's way
up there at 8000 feet. You're at your tie-down position (more about
tie-downs in later adventures) near the end of runway 16, but you're
not tied down. You're ready to fly. |
||
 |
You know (from Spanaway I) what
your pretakeoff procedures are: ten
degrees of flaps. Trim elevator for takeoff (two quick ups). Check carb
heat off. And.... An important and. It's that we mentally add 400 feet to the airport elevation. The elevation at Spanaway is 385. So we're talking 785. But given some pretty fuzzy television sets and monitors, it's easier to work with closest whole numbers than with exact settings. So think 800 feet. Airport elevation +400 feet is how high you have to be before making any turns. So that means we'll take off and climb to 800 before we start our turn to the crosswind leg. Then we'll continue climbing to the next important altitude plateau, which is pattern altitude. We know that's airport elevation +1000 feet, which in the case of Spanaway is 1400 feet. So we'll plan to get straight and level when the altimeter reads 1400. If you're all ready, let's get going. Use your standard taxi rpm (Cessna 1205, Piper 850) and move ahead, steering as required. Keep rolling as you turn onto the active runway. Add maximum power as you get lined up. Steer if need be as you roll. Rotate as usual at 60+ in the Cessna, 80 KIAS in the Piper. (If you forgot how to rotate, or what 60+ is, go back to Spanaway 1.) Dump your flaps as soon as your VSI shows 500 fpm up. Then follow this specific procedure to become part of the pattern: |
|
 |
You do all of the above all at once. Well, not exactly all at once. But you have to sort of mix them up and at least think about them all together. Sure, this is a busy time, but once you're downwind, you can relax for a few seconds (maybe two, to be exact). For your reference as you repeatedly (I say repeatedly) practice the transition described by reflying this adventure, here's how you figure headings for the various legs once you know the runway heading (and if you don't know the runway heading by the time you're halfway down it, chop the power, pull over and brake on the grass, put your head in your hands, and just have a good cry. You've earned it). In a left-hand pattern, subtract 90 from each leg to get the heading for the next leg. Here at Spanaway, for instance, takeoff (or upwind) is heading 160, crosswind is heading 70 (160 - 90), downwind is heading 340 (70 - 90, or -20, thus 360 - 20), base is heading 250 (340 - 90), and final is at heading 160 (250 - 90), the same as takeoff or upwind. In a right-hand pattern, everything is the same except that you add 90 for each leg. Now, heading downwind at pattern speed and altitude, you realize you've already learned how to do all the rest, from here to touchdown. You've got all the numbers and the procedures down pat. You've put the ribbon on the box. • Carb heat when you're opposite touchdown point. Sure. • Turn base when runway is rear of wing. Right. • Ten degrees flaps/one down elevator on base leg. You got 'em. • Keep runway in sight with 45-degree view. Thar she blows! • Turn final just before runway end slips from view. Roger. • Simultaneously down elevator/notch of flaps-to full flaps. All hanging out. • Adjust power/elevator to suit as runway comes up. Keep some sky in view else glide too steep. Gotcha. • Watch airspeed with each notch of back pressure. Stall warning horn? Take off a notch of back pressure. • Just above stall, hang there until you touch. Lovely. So that you can get more pattern practice on each flight, learn how to "touch and go" when you complete a landing. Try this: |
|
|
The elevator setting is approximate in the simulator because you're not likely to hit it right on the nose. In an actual aircraft, you'd simply release all the back pressure you'd put on the yoke as you landed. If you remember where your elevator position indicator is when you trim for takeoff (two quick ups, remember?), try to get close to that. It isn't so important, because you'll have takeoff airspeed very soon after you transition from touchdown. But do be sure to execute some kind of elevator down trim, and get the flaps up, and get the carb heat off-all smoothly-after you touch and before you go. It's essentially three things, and only three, that you have to remember: (1) elevator, (2) flaps, (3) carb heat. Then it's full power and take off again. When you learn to fly the "box"-the rectangular pattern around an airport-and fly it well, you'll be flying well indeed. This exercise squeezes all kinds of control challenges into a short period. It's no wonder instructors use it as the basic training procedure for learning to fly. And no wonder that students are soloed soon after they can fly the pattern reasonably well-and long before they really know how to fly from A to B. Now that you've concluded the Spanaway adventures, you've got a good deal of precision flying technique in your repertoire. Refer to it as needed. Use it to fly everything in this book and to fly the simulator in general. Use the techniques described, or your own version and refinements. It's a far cry from just hacking around. Really. I can see a hint of professionalism in your work already. |
Table of Contents | Previous Section | Next Section