Flying Flight Simulator
Sky-High Adventure with the Macintosh, Amiga, & Atari ST
by Charles Gulick
Chapter 5
SOMETHING TO BITE INTO
It's high time you gave yourself another round of applause. Bravo! Consider how much you've learned. When you began this book, the Cessna 182 simulator was simply a toy to you. Probably you weren't really flying it—it was flying you around until it crashed. Now it's an airplane. And you've come a long way toward learning to master it and fly it with skill and precision.
As a reward, I'll give you some time now in the Gates Learjet 25G. I know you're anxious to take hold of that sleek, fast, powerful machine. And you'll see that much of what you've already learned in the Cessna applies also to flying the Learjet.
Boot your simulator and load your first situation disk, unless it's already loaded. Then pause and recall the situation you titled HLDNG IKK 22/C.
Click on FILE in the menu bar, and then highlight and click on JET.
You're not staying here at Kankakee. You only loaded the IKK situation to get your original realism defaults and op neutral in place.
Now, click on NAV in the menu bar, and then click on POSITION SET.
Click on the box opposite AIRCRAFT NORTH, and type 15376.756. Opposite EAST, type 5808.4953, and set ALT to 0.0. (The fractional digits in the ALT value don't matter.) Put the tower at NORTH 15375.000, EAST 5807.0000, and ALT 165.0000. Press RETURN and close the window.
Unpause the situation. You're in your Learjet looking toward Runway 24R at Los Angeles International Airport (airport code LAX), Los Angeles, California.
Pause again. Open the VIEW window, and set the spot plane to the rear of your aircraft at a distance of 200 feet and an altitude of 20 feet. Set TRANSITION to FAST (if it's otherwise) and close the window.
Open the ENVIRO window and set the season to FALL. Open it again and click on WINDS. Click on the LEVEL 1 TOPS box and type 9000. Click on the BOT box and type 4000. Now, click on the DIR box opposite LEVEL 1 and type 332. Click on the box opposite SPEED and type 4. Under SURFACE WINDS AGL, type 4000 opposite DPTH, type 280 opposite DIR, and type 6 opposite SPEED.
What you've done is to record that the surface winds are from the west (specifically, from 280 degrees) at six knots and that this condition prevails up to 4000 feet above ground level. From 4000 to 9000 feet AGL, the winds are from the northwest (332 degrees) at four knots. Pilots refer to these upper-level winds as “winds aloft” to differentiate them from surface winds.
Close the WINDS window by clicking on the box at the upper left. (You may have to press RETURN first.)
Confirm that your elevator trim is at op neutral.
Next, press S to establish the spot plane view; then press Q and save this situation as READY LAX 24R/L.
Notice that your instrument panel is almost identical to the Cessna's panel, with two major differences. The first is evident right away: Your airspeed indicator in the Gates Learjet 25G reads in KTS TAS, meaning “Knots True Air-Speed,” and the speed calibrations are, of course, much higher than those in the Cessna.
As you start to move, you'll notice the other difference: Your tachometer (the instrument labeled RPM) will read the percentage of power you apply, in the range of 0% to 100%, rather than rpm (as in the Cessna).
The panel preflight check for the Learjet is the same as for the Cessna 182. Now that you understand the procedure, it can be simply stated as: true the DG, true the altimeter, confirm op neutral, check carb heat off, confirm zoom factor 1.00, and check panel lights off. Go ahead and do the panel preflight check.
You'll also prepare for takeoff now, because you're in position to depart.
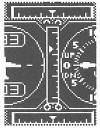
The takeoff prep for the Lear is different from that for the Cessna: In Amiga/Atari, takeoff trim for the Lear is two sets of six quick ups followed by one slow up. That means trim six quick ups, pause, then trim another six quick ups, pause, and trim one more up. In the Mac, use the mouse to trim up three marks above 0 VSI (see detail).
Trim for takeoff now and extend your flaps 10 degrees. (You set flaps for takeoff the same in the Lear as in the Cessna.)
Set the time to 08:00:nn. (The seconds don't matter, so let them remain as they are.) You set time in the TIME window exactly as you change frequencies in the COM and NAV windows, by clicking on the left or right digits in each segment.
The following procedures are most important before you take off on this flight:
Tune NAV 1 to a frequency of 109.40.
Tune NAV 2 to a frequency of 112.60.
(As mentioned earlier, for simplicity's sake I don't write these frequencies out as, for example, “one zero nine point four zero.” But I want you to think of them in that form and say them to yourself as you read. For a pronunciation guide, see the table listed under “Phonetic alphabet” in the Glossary.)
Unpause now, and practice stopping and restarting your engine. The procedure is the same as for the Cessna. Cycle with the 1 key to shut down and with the 2 key to start up again.
Your takeoff procedure for the Lear will be the same as in the Cessna, except that you will rotate at 115 knots instead of at 70 knots.
Switch to your out-the-windshield view, use a little throttle to taxi forward, and line up, steering with the rudder exactly as you did in the Cessna.
Open your throttle all the way and continue to steer with your rudder pedals.
Rotate at 115 knots (needle between 100 and 130).
Retract your gear as soon as you are airborne.
Cancel your rotation pressure and dump your flaps.
Back off your throttle to 84% power in Amiga/Atari or to 72% power in Mac. (Power/performance discrepancy between the versions is considerable.)
Downtrim gradually so that you reach and maintain a 500 fpm climb reading on your VSI. You'll discover that, compared with the Cessna, you can trim down rather quickly in the Lear.
As you trim, begin a standard-rate turn to the right (you don't need back pressure when you're climbing) to a compass heading of 335 degrees. Use the turn coordinator to establish the correct bank.
Continue downtrimming in a steady and deliberate manner. Your trim objective, as in the Cessna, is operational neutral.
Start rolling out of the turn when your compass reads about 315 degrees. After you neutralize to level your wings, use rudder to get a heading of precisely 335 degrees.
You'll probably still be able to see some of the Verdugo Mountain range off to your right. (Take right-side views with the Y, H, and N keys, which produce views at 45, 90, and 135 degrees, respectively.) The Verdugo Mountains are northeast of Burbank. The near highway, almost paralleling your course, is Interstate 405, locally called the San Diego Freeway.
Your cruising altitude will be 7500 feet. When you're 300 feet below that altitude, begin to reduce throttle, setting it for 76% power in Amiga/Atari or for 62% power in the Mac. In the Mac, you'll fine-tune your trim at altitude for straight and level flight at the 62% power setting.
As you trim down toward op neutral, your airspeed will climb steadily, finally settling at approximately 400 knots.
When you are trimmed to op neutral, use power to maintain your 500 fpm climb (if you're still below cruise altitude) or to zero your VSI (if you're at your cruise altitude). Don't rush. This is a big machine, and it takes time to coax a reaction from it. If you change power by too large a degree, the reaction—when it happens—will be greater than you wanted, and you'll have to correct in the opposite direction.
You'll have a little time on this flight, though surprisingly little, to get used to the Learjet. Believe it or not, we're en route to San Francisco.
Pause for a moment to read the next few paragraphs. (Note that when you pause your clock doesn't stop, so you really won't have an accurate measure of the time this trip will take or the true elapsed time of any trip during which you pause. In later flights we'll try to avoid pauses, but at present they're necessary for instructional purposes.)
A little trick in altitude management, particularly effective in the Learjet, is to “nudge” the nose of the aircraft up or down when it seems to be hanging just below or just above 0 VSI and when you're approximately at your desired altitude. You do this by applying a notch of pressure, forward or backward, on the yoke, depending on whether the VSI is “hung” in a slight climb or a slight descent. Then when the VSI zeros, respond with a notch of pressure in the opposite direction.
However, if you find that you are climbing or descending inordinately, your power setting is too high or too low. Change it—a notch at a time—to get the result you want. Power, ultimately, gives you the most precise control.
Now, about the flight plan: Your present compass heading should be 335 degrees. You are flying on this heading to a point on the San Francisco and Oakland Area Chart where the Visalia and Panoche VORs intersect. Visalia and Panoche—and all VOR stations covered by your San Francisco and Oakland Area Chart—will be out of range for a while. A lot of geography (and many VOR stations) lies between here and San Francisco but is not covered in the simulation. If your OBI 1 has been reading FROM, it's identifying the Santa Ana VOR, south of Los Angeles at John Wayne (Orange County) Airport. Santa Ana has the same VOR frequency as Visalia in northern California—109.40. Your OBI 1 will soon turn to OFF as you depart the Los Angeles chart area.
Learjet speeds make long trips easy, and northern California will turn on in the simulation before you know it.
What you'll do is fly your present heading until your disk drive whirs, you see some signs of civilization out your windshield, and both your OBIs suddenly become active. At that point you'll pause, and I'll show you how to determine your exact position.
Unpause now and continue the flight. Remember that your basic power setting for this cruising altitude is 76% in the Amiga/Atari or 62% in the Mac. But, use the power you need to do the job; for example, you may be at a slightly lower or higher power setting for fairly long stretches until everything is balanced. Wait for the aircraft to settle down, and don't chase the needles. Remember that, after you've climbed to 7500 feet, you want to maintain that altitude and stay on a compass heading of 335.
Look behind you (use the B key) and see if the Los Angeles area is still visible.
Scan your primary instruments on the left side of your panel regularly. And, as regularly, check for any sign of action in your OBI 1 window.
Nothing will be visible out your windshield for a while, except sky and ground.
In the meantime, true your DG and your altimeter.
As you fly, open the VIEW window, set the spot plane off your right wingtip, and change its altitude to zero. Then you can use the S key to see what you look like in the Lear-jet, flying straight and level. (I hope!)
When your disk drive whirs and you see metropolitan areas and a highway ahead, your OBIs will both become active. At that point, pause the simulation. Three cheers! You've entered the San Francisco chart area.
One of the cities ahead of you is Fresno, California, though I can't determine which, because the city/highway relationship (if the highway is Interstate 5, which is probable) does not match any of my place references. Off your right wingtip, perhaps partially hidden by the wing, is Visalia, California, and its airport.
The disk access probably changed your compass heading somewhat because you were entering a new simulator area, but that poses no problems.
If you don't see the geographic features I've been describing, you may have turned to your heading a bit late after departing Los Angeles International. In any event, I'll now show you a technique for determining your exact position on the San Francisco and Oakland Area Chart.
Adjust the OBI 1 knob to center the needle with a TO reading. Adjust the OBI 2 knob to do the same.
The numbers that appear in the OBI course windows indicate the radials to the Visalia (OBI 1) and Panoche (OBI 2) VORs on which you are currently situated. Your NAV radios are tuned to the respective frequencies of those stations. Your exact position is where the two radials intersect. You can find this position on the chart using a pencil and a straightedge. Draw a line to intersect the Visalia TO radial you are on, as read on the perimeter of the Visalia compass rose, and the center of that compass rose. Extend the line to the bottom border of the chart. Draw another line to intersect the Panoche TO radial you are on, the center of the Panoche compass rose, and the first line you drew.
The intersection of the two lines is your exact location. In my flight (I fly, of course, while I'm writing), I'm at the intersection of Visalia R308 and Panoche R280. If you're somewhere near that position, your flight closely paralleled mine. If you're far from there (or, perhaps, don't know where you are), open the NAV and POSITION SET windows, set your aircraft at NORTH 16305.569 and EAST 5858.6279, and then close the window. Now you'll see the highway and metropolitan areas I've been talking about. And you're ready for the next stage of this flight.
Before you continue, however, save the present situation as VIS-PAN INT /L, which means that you're at the Visalia and Panoche VOR intersection. If you have to quit the simulation for now, then save to disk as usual. When you reboot, however, remember that you'll probably have to reset your NAV radios and their associated OBIs.
Because you've saved this moment of the flight, you can recall it as often as you like to practice turning at an intersection and tracking a specific VOR radial. That's what you're going to do now.
Before you unpause, I'll describe the procedure:
You will fly radial 295 to the Panoche VOR station. If you put a straightedge along that radial, you'll see that it points from your present position toward Runways 28R and 28L at San Francisco International Airport (SFO). (By the way, these runways are incorrectly oriented on the enlarged section of the San Francisco and Oakland Area Chart, as you'll see if you compare the two sides.) Because the surface winds are from the west, your ultimate landing will be on 28L. Whenever possible, aircraft are landed into the wind; thus, you can determine which runway is active at an airport if you know the wind direction. The wind isn't always a straight-on headwind, as it is today, so you'll often have to make crosswind landings. But always land into the wind to whatever degree is possible.
When you're within range of SFO, you'll switch to a radial of the San Francisco VOR and track it all the way in.
You're through with the Visalia VOR, so tune NAV 1 to the Panoche VOR frequency, 112.6. This frequency will give you a DME readout when you're within range. NAV 2 has no associated DME, so you'll use NAV 1 as your primary navigation radio.
Tune NAV 2 to 115.8, the San Francisco VOR frequency. When the OBI turns on, you'll know you're in range.
Next (this is important), crank in the 295 radial on OBI 1. When you unpause, you're going to turn left immediately to fly to and intercept that radial. Until now, you've used the magnetic compass as a heading indicator to make such turns. And perhaps you've wondered about the value of your directional gyro, or DG, which usually drifts (and seems redundant, considering that you have a compass).
But you may also have noticed that the compass lags considerably when you turn. You may think you're rolling out on the right heading, but the compass keeps spinning around and has to settle down before you know where you're actually pointed.
This is where the DG shines. It will show your correct heading at every stage of your turn, moment to moment, with no lag and with no settling-down time needed. You'll use the DG on your turn from your present heading to your intercept course, which will be 245 degrees. This course represents a 50-degree “bite” for reaching R295, which you'll intercept at a 45-degree angle. I'll explain “bites” later in this chapter. For now, be sure the OBI is set for 295 degrees. And true the DG so that it agrees with your present compass heading.
Unpause now, apply a little back pressure to hold your altitude, and make a standard-rate left turn to a heading of 245 degrees. If you need more back pressure to hold your altitude in the turn, use it. When you roll out, gradually take off the pressure you applied. Correct your heading as necessary, using rudder.
The radials are wide apart this far from Panoche VOR, so it will take you a few minutes to fly to R295. When you're a needle's width from it, turn directly to a compass (or DG, if it's trued) heading of 295. The needle should be centered when you're on that heading. As you fly, the needle may move away from center. Correct to bring it back, using your rudder.
Now, you're going to make the transition to slowflight, which in the Learjet means an airspeed of about 200 knots. It's very convenient to be able to slowfly the Lear, because at your usual speed of 400 knots everything happens awfully fast. It happens fast at 200 knots too, but you have twice as much time to think.
The transition to slowflight in your jet involves the same procedure as in the Cessna. First, put on your carb heat, and then gradually trim to slowflight neutral (same position as in the Cessna) while reducing power to 58%-60% (Amiga/Atari) or 54% (Mac); these are approximate figures to get you into the correct general range. Maintain your present altitude by alternating uptrim and power reduction. Try to maintain a 0 VSI rate. If you can't maintain that rate exactly, average it.
Your objective is straight and level slowflight at 200 knots, with your elevator trimmed up to the slowflight position, so check your trim indicator frequently as you make the transition. Once you're trimmed for slowflight, use your throttle to get to and maintain your altitude at 7500 feet.
Your DME will turn on as you fly so that you'll know how far you are from the Panoche VOR station.
Each dot across your OBI dial represents four degrees. If the needle moves, correct your heading a few degrees in the same direction, following the needle's movements until it centers again. As you get closer to Panoche, you'll be fine-tuning your adherence to the radial. When you fly a radial, the OBI needle is your primary directional reference; your compass and DG headings are secondary. It is vital to your flying proficiency that you learn how to hold a heading and, in the present case, to fly the needle, keeping it centered. Don't fix your eyes on it, but check it regularly and correct as necessary. Wind direction plays a role in radial flying, as it does in all flying, so your magnetic compass reading (and DG readings, with the DG trued) may not agree with the radial bearing. But they will be in the same ballpark.
When you get close to Panoche, your OBI needle will depart radically from center. Ignore this—VORs act unstable when you are close to them. Actually, the needle swings in the direction of the VOR station as you pass close to it. Stay on your heading, and ignore the OBI if you're within a few miles of the VOR station.
The needle will center when you're a few miles beyond the VOR station you've been tracking. And then the OBI will read FROM because you are flying the identical radial away from the station.
Continue to work to get and/or hold your 7500 feet of altitude. You'll need it.
After your disk drive whirs, indicating that the simulator is loading some new parameters and some new scenery, the landscape will change radically. You'll see one or more mountains immediately below you and some water off in the distance. After another disk access, you'll probably be flying between two mountains and toward a body of water. In a moment, some highways will streak across your course.
When the near mountain disappears from your windshield, reduce power to approximately 50% in Amiga/Atari, 38%–40% in the Mac, or whatever is required to set up a descent rate of approximately 500 fpm. Note that your airspeed remains virtually constant at 200 knots—a consequence, as you know by now, of your trim procedure.
Tune NAV 1 to the same frequency as NAV 2, namely San Francisco VOR on 115.8. You'll see that you're within range of the VOR station at San Francisco International.
Now, pause the simulation.
Your DME shows your distance from your destination.
Save this situation as INBND SFO 28L/L, because you intend to land on Runway 28L at San Francisco International. Again, if you're shutting down completely at this point, save RAM to disk as well. In fact, it's a good idea to save to disk each time you save to RAM, and then go on flying. This will prevent inadvertently losing all your saved situations when you quit the simulation.
You're going to track R281 to the San Francisco VOR because Runway 28L at SFO bears 281 degrees, and the VOR station is right on the airport. Runway numbers describe the approximate, not the exact, bearing of airport runways, from 000 (360) degrees to 350 degrees in steps of 10 degrees; the final zero is dropped in the runway number. A runway bearing approximately north is numbered Runway 36 (not 0). The numbers then continue around the compass rose, with runways numbered 1, 2, 3, and so on, through 35. When you're on a runway and know that you're lined up straight (your map helps you determine that), jot down the actual bearing in your flight notebook for future reference.
I'm not implying that a given radial will line you up exactly with a runway of the same number, even when the VOR is at the airport. Far from it. Only an ILS (Instrument Landing System) approach, which is beyond the scope of this book, will do that. (I describe an ILS approach in Flight Simulator Co-Pilot, Microsoft Press, 1986.) But if you're flying a distance out, tracking a VOR station located at your destination airport, and flying in the direction from which the landing will be executed, you might as well be on the radial that you know agrees with the bearing of the runway. If you don't know the exact bearing, fly the radial that agrees with the runway number. Approaching an airport from a direction other than the landing direction calls for other techniques, which we'll explore later.
Both of your NAVs are now tuned to the San Francisco VOR on a frequency of 115.80. Use the selector knob on OBI 2 to center its needle. The OBI 2 readout then indicates which radial you are on at present. On OBI 1, select the radial you want to fly, 281, and then check your present compass heading.
These three items of information—the radial you're currently on, the radial you want to fly, and your present compass heading—tell you what you must do to get the result you want. Knowing which radial you're on, you must take a “cut,” or “bite,” toward the radial on which you want to fly, using your compass (or your trued DG) as a guide throughout the maneuver.
In my “prototype” flight, OBI 2 tells me that I'm now flying on R276. OBI 1, of course, is set to 281. My compass heading is 297 degrees.
Remember the wheel and spoke analogy. The wheel has 360 spokes. You're on one of the spokes, flying toward the hub. You want to fly on spoke 281, which is either to your left or your right. In my case, because I'm on spoke 276 and flying toward the hub, spoke 281 is to my left. How far to my left depends on my distance from the hub, because the distance between spokes increases, of course, the farther from the hub I am.
At my present distance, 30 nm on my DME, I'll take a 30-degree bite to expedite the radial change. Otherwise, at Learjet speeds, I'd be over San Francisco Bay before I got organized.
The maximum bite is 90 degrees, which I'd use if I were much farther from either the San Francisco VOR or the radial I want to fly. Here's a simple rule for the maximum bite and thus for the fastest radial change: To intercept a given radial at a 90-degree angle, add 90 to the radial number if it's to your right or subtract 90 from the radial number if it's to your left; then, fly the resultant heading until intercept.
Substitute your planned angle of intercept for 90, and the same formula applies for any bite—for instance, the 30-degree bite I'll take. I want R281, which I know is to my left because I'm inbound to the station on R276. 281–30 = 251. I'll turn left to a heading of about 251 degrees and fly until the OBI 1 needle shows I'm coming up on R281. Then I'll turn right to a heading of 281 and fly the needle. A standard-rate turn, started a few degrees ahead of the radial at this distance out, should work pretty well.
The exact size of the bite is not all-important. Many pilots regard 30 degrees as optimum. In keeping with the formula, that would mean adding 30 degrees to the desired radial if it's to the right or subtracting 30 degrees from the desired radial, as I did, if it's to the left. The smaller the cut, the longer it will take to reach the radial you want and the longer it will take to effect the change. But you'll also be that much closer to the station when you do reach the radial you want to fly.
The closer you are to the station, the smaller the cut should be, simply because the radials are closer together and a big cut means lots of aileron work in a short amount of time. Also, you're usually not changing radials close to the station, but simply correcting to keep the needle centered. Such corrections are usually a matter of two- or three-degree bites—not to a new heading, but merely to keep the straying needle centered. For these bites you'll use your rudder.
Now, figure out the location of R281 from your present position. Recalling the wheel and spoke analogy again, what's the number of the spoke you're on? (Its number appears in the top window of OBI 2 when that OBI's needle is centered.) “Think” the 360-degree wheel and imagine yourself on a spoke of it, facing the hub. Is spoke 281 to your right or to your left?
Whatever the direction of R281, you'll fly to intercept that radial at the angle you think will be most efficient. True your DG before you begin, and use it so that you'll know your heading moment to moment. A few degrees shy of the intercept, turn to a heading of 281 so that you're in agreement with the radial course. Then fly the needle, continuing your descent.
When you're fairly stabilized on R281, pause and save your situation as R281 SFO 28L/L, and save RAM to disk to be safe. Then you'll be ready to go on to the next chapter.
Table of Contents | Previous Chapter | Next Chapter